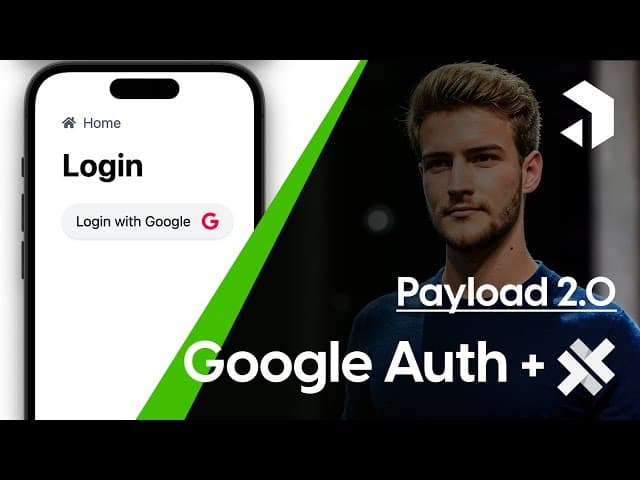
Implementing Google Authentication in a iOS Capacitor App with Payload NextJS


Welcome to our comprehensive guide on integrating Google authentication into your Capacitor app! This tutorial is designed to enhance your mobile application with secure and user-friendly login capabilities, following our previous discussions on Payload NextJS. By the end of this article, you will have a clear understanding of how to implement this feature step-by-step, ensuring a seamless user experience.
This article provides a detailed written tutorial of our video guide available on YouTube at https://www.youtube.com/watch?v=4p0aR07f73w. If you're a visual learner or prefer following along with video instruction, we recommend checking out the video which covers the same content while offering additional context and real-time demonstrations of each implementation step.
Table of Contents
- Overview of Google Authentication in Capacitor
- Setting Up Your Capacitor App
- Modifying the Server-Side Redirect Configuration
- Registering URL Schemas with Apple
- Implementing the OAuth Flow
- Implementing an App URL Listener
- Extracting the Token
- Handling Token Storage in Capacitor
- Setting Up Axios for API Requests
- Fetching and Displaying User Data
- Conclusion
- FAQs
Overview of Google Authentication in Capacitor
Google authentication provides a convenient way for users to log into applications using their Google accounts. This not only simplifies the login process but also enhances security by leveraging Google's robust authentication mechanisms. In this guide, we will walk through the implementation of Google authentication in a Capacitor app, focusing on the necessary adjustments from our previous tutorials.
Prerequisites
Before diving into the implementation, ensure that you have the following prerequisites in place:
- Basic understanding of JavaScript and React.
- Familiarity with Capacitor and its environment.
- Previous experience with Payload NextJS, as this guide builds upon that knowledge.
- An active Google Cloud project with OAuth credentials configured.
Setting Up Your Capacitor App
To get started, you should have a simple Capacitor app ready with a login screen. This is where users will interact with the Google authentication process. We will implement a button that allows users to log in or register using their Google accounts.

Creating the Login Button
In your login component, create a button that triggers the Google login flow. This button will open a browser window where users can select their Google account and authenticate.
When users click on the button, they will be redirected to Google's OAuth page to log in.
Modifying the Server-Side Redirect Configuration
One of the crucial steps in this process is modifying the server-side redirect. This involves adjusting the server.ts file to ensure that, after successful authentication, users are redirected back to your app with the necessary information.
Understanding Redirects
The redirect is critical because it dictates where the user will land after authentication. We want the app to be notified rather than just opening a new browser window with a token. To achieve this, we must define a URL schema that our app can recognize.
Registering URL Schemas with Apple
To enable your app to receive notifications post-authentication, you need to register a URL schema. This involves modifying the plist file in your iOS project.

Steps to Register URL Schema
- Open your iOS project in Xcode.
- Navigate to the
Info.plistfile. - Add a new entry for
CFBundleURLTypes. - Include an array with an item that specifies
CFBundleURLSchemespointing to your app's schema.
Implementing the OAuth Flow
After setting up the URL schema, we need to implement the OAuth flow in our Capacitor app. This involves calling the server backend when the user attempts to log in.
Creating the Login Functionality
On the login page, you will create a click function for the login button. This function will open a browser window pointing to your server's OAuth authorized endpoint, which communicates with Passport.js.
This flow will open a browser window for the OAuth process, after which your app will be notified.
Implementing an App URL Listener
Next, we need to implement an app URL listener to handle the incoming URL containing the token after authentication.
Setting Up the Listener
To set up the listener, you will import the necessary app package from Capacitor and define a function that registers the listener on the app URL open event.
app.addListener('appUrlOpen', (data) => { /* handle URL */ });
Extracting the Token
Once the app receives the URL, you will need to extract the token from it. This involves filtering the URL to ensure it starts with your defined schema and then retrieving the token parameter.
Saving the Token
After extracting the token, you will save it within your app. This is essential for maintaining user authentication state across sessions.
Closing the browser window will notify the app that authentication has occurred.
Handling Token Storage in Capacitor
One challenge with Capacitor apps is that cookies cannot be reliably stored due to iOS restrictions. Therefore, we will use a preferences library to securely store the token.

Implementing Secure Storage
To implement secure storage, you will use the preferences library to save the token in a secure location that won't be deleted by iOS. This ensures that the token is available for future requests to your server.
Preferences.set({ key: 'token', value: token });
Setting Up Axios for API Requests
With the token securely stored, we can now set up Axios to handle API requests. This allows us to include the authentication token in the headers of our requests.
Creating an Axios Instance
Define your Axios instance, setting the base URL and including the token in the authorization header:
const axiosInstance = axios.create({ baseURL: 'https://your-api-url.com', headers: { Authorization: `Bearer ${token}` } });
Fetching and Displaying User Data
Finally, we will implement functionality to fetch user data and display it within the app. This involves making an API call to retrieve user information, such as their profile picture and email address.

Implementing the User Data Fetching
In your settings component, use the Axios instance to call your server's endpoint for user data:
const fetchUserData = async () => { const response = await axiosInstance.get('/users/me'); setUserData(response.data); };
Conclusion
In this guide, we have walked through the process of implementing Google authentication in a Capacitor app. From modifying server-side redirects to securely storing tokens and fetching user data, you now have a comprehensive understanding of how to enhance your app's login capabilities.
If you have any questions or feedback, please feel free to leave a comment below. Your input is invaluable to us!
FAQs
1. What is Payload NextJS?
Payload NextJS is a powerful framework that allows developers to build dynamic applications using React and Node.js, providing tools for content management and authentication.
2. Can I use other authentication methods besides Google?
Yes! While this tutorial focuses on Google authentication, you can implement various other authentication methods such as Facebook, Twitter, or custom email/password systems.
3. What should I do if I encounter issues during implementation?
Ensure that all configurations are correctly set up, particularly in your Google Cloud Console and server settings. If issues persist, consult the documentation or seek help from the community.
4. Is it necessary to use Capacitor for this implementation?
While Capacitor is a great choice for building cross-platform apps, you can implement similar authentication flows in other frameworks as well, such as React Native or Flutter.
5. How can I enhance security in my app further?
Consider implementing additional security measures such as token expiration, refresh tokens, and secure storage mechanisms to protect user data.
Thank you for following along! We hope this guide has been helpful in your journey to implement Google authentication in your Capacitor app. Stay tuned for more tech tutorials!


